How to Screenshot on Windows: Complete Step-by-Step Guide
If you have ever wondered how to screenshot on Windows, you are not alone. Taking screenshots is one of the most practical and necessary skills for everyday computer users. Whether you want to save an important message, document an error for technical support, create tutorials, or share something interesting from your screen, knowing how to do it efficiently makes a big difference.
Many users search for terms like how to take a screenshot on Windows, how to take screenshot on Windows, or more specific variations such as how to take screenshot on Windows 11. The reason is simple: Windows offers several different ways to capture your screen, and each one serves a different purpose.
In this guide, you will learn how to capture a screenshot on Windows step by step using built-in tools and keyboard shortcuts. Everything is explained clearly so both general users and those with some experience can follow along comfortably.
By the end of this article, you will confidently know which method works best for your needs.
- How to Screenshot on Windows
- Method 1: Using the Print Screen (PrtScn) Key
- Method 2: Using Windows + Print Screen (Automatic Save)
- Method 3: How to Take Screenshot on Windows 11 Using Snipping Tool
- Method 4: Windows + Shift + S (Quick Capture Tool)
- Method 5: Alt + Print Screen (Active Window Only)
- Method 6: Using Xbox Game Bar
- Windows 10 vs Windows 11 Screenshot Differences
- Common Screenshot Problems and Fixes
- Conclusion
How to Screenshot on Windows
Method 1: Using the Print Screen (PrtScn) Key
The most traditional way to learn how to take a screenshot on Windows is by using the Print Screen key.
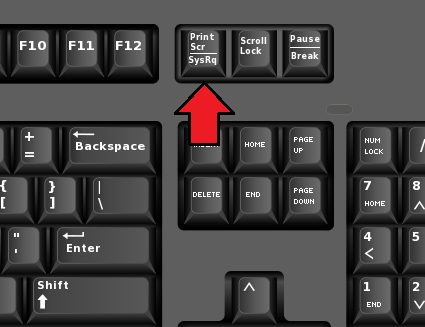
Step 1: Locate the Print Screen Key
On most keyboards, the Print Screen key is located in the upper-right section. It may be labeled as:
- PrtScn
- PrtSc
- Print Screen
On laptops, you may need to press the Fn key together with PrtScn.
Step 2: Capture the Entire Screen
Press the Print Screen key once. This captures the entire screen and copies it to your clipboard.
You will not see any notification. This is normal.
Step 3: Paste the Screenshot
Open Microsoft Paint, Word, or any editing program and press:
Ctrl + V
Now you can edit or save the image.
This method is simple and fast, especially if you only need to paste the screenshot somewhere quickly.
Method 2: Using Windows + Print Screen (Automatic Save)
If you prefer automatic saving, this is one of the best answers to how to screenshot on Windows.
Step 1: Press Windows + PrtScn
Hold the Windows key and press Print Screen at the same time.
Your screen will briefly dim. That dimming effect confirms the screenshot was captured.
Step 2: Locate Your Screenshot
Go to:
This PC → Pictures → Screenshots
Windows automatically saves the file in PNG format.
This method is ideal for users who frequently take screenshots and do not want to paste manually each time.
Method 3: How to Take Screenshot on Windows 11 Using Snipping Tool
If you are specifically searching how to take screenshot on Windows 11, the modern Snipping Tool is your best built-in option.
Windows 11 integrates the Snipping Tool with improved editing features.
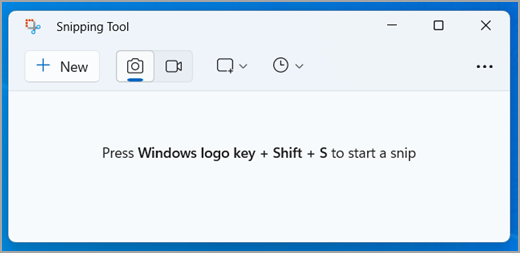
Step 1: Open Snipping Tool
Click Start and type:
Snipping Tool
Open the app.
Step 2: Click “New”
Press the New button to begin capturing.
Step 3: Choose the Capture Mode
You can select:
- Rectangular snip
- Freeform snip
- Window snip
- Full-screen snip
Choose the one that matches your needs.
Step 4: Edit and Save
After capturing, the screenshot opens inside the editor. You can annotate, highlight, crop, or save the image directly.
This is one of the most complete methods when learning how to capture a screenshot on Windows.
Method 4: Windows + Shift + S (Quick Capture Tool)
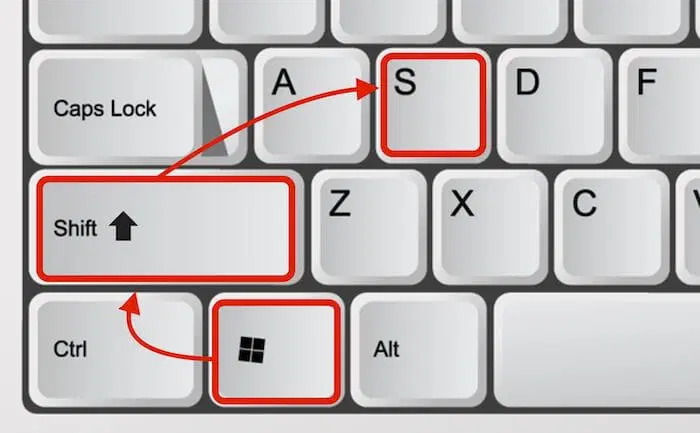
For speed and precision, press:
Windows + Shift + S
This shortcut works in both Windows 10 and Windows 11.
Step 1: Activate the Shortcut
Your screen will dim, and a small toolbar will appear at the top.
Step 2: Select Capture Type
Choose from rectangular, freeform, window, or full-screen capture.
Step 3: Select the Area
Drag your cursor over the area you want to capture.
The image is copied to your clipboard, and you can paste it immediately or click the notification to edit.
This is one of the fastest answers to how to take screenshot on Windows efficiently.
Method 5: Alt + Print Screen (Active Window Only)
Sometimes you only need to capture one application window.
Step 1: Click the Window You Want
Make sure it is active.
Step 2: Press Alt + PrtScn
This captures only that window and copies it to the clipboard.
Step 3: Paste and Save
Open Paint or Word and press Ctrl + V.
This avoids cropping unnecessary background content.
Method 6: Using Xbox Game Bar

Windows also includes Xbox Game Bar, useful for gamers and screen recording.
Step 1: Press Windows + G
The Game Bar overlay will open.
Step 2: Click the Camera Icon
Click the screenshot button.
Step 3: Find Your Screenshot
Go to:
Videos → Captures
This method works especially well while gaming.
Windows 10 vs Windows 11 Screenshot Differences
Users often ask how to take a screenshot on Windows 11, but most keyboard shortcuts remain the same as Windows 10.
The main difference is the improved Snipping Tool interface in Windows 11.
Shortcuts like:
Windows + PrtScn
Windows + Shift + S
Alt + PrtScn
work on both systems.
So once you learn one, you essentially master both.
Common Screenshot Problems and Fixes
If pressing Print Screen does nothing visible, remember it copies to clipboard.
If you are using a laptop, try Fn + PrtScn.
If screenshots are not saving automatically, check your Pictures → Screenshots folder.
Make sure Windows is updated if Snipping Tool does not open.
Conclusion
Learning how to screenshot on Windows is a simple but essential skill. Whether you are documenting an issue, creating content, or saving important information, Windows provides multiple built-in tools that make the process easy.
Si quieres conocer otros artículos parecidos a How to Screenshot on Windows: Complete Step-by-Step Guide puedes visitar la categoría Blog.
Leave a Reply